
When I was preparing my last post about the GRO’s new option for instant-access digital downloads of the images for selected birth and death registrations, I had hoped to be able to include a downloadable template for you to use for your own records. It seemed it wasn’t possible for me to do that. So the next best thing is to show you how to create your own.
I created the template in my last post using Photoshop – just because I already had it open and wanted to tweak one of the images. If you already use Photoshop or something similar you won’t need me to show you how to do this. However, more of you are likely to have Word, so for anyone who’s more used to using Word for plain old typing and would like to know how to create a template, here’s a tutorial. I hope it’s useful to at least some of you.
1. First, open a new document in Word. All the options from the top menu I’m about to mention are indicated below.
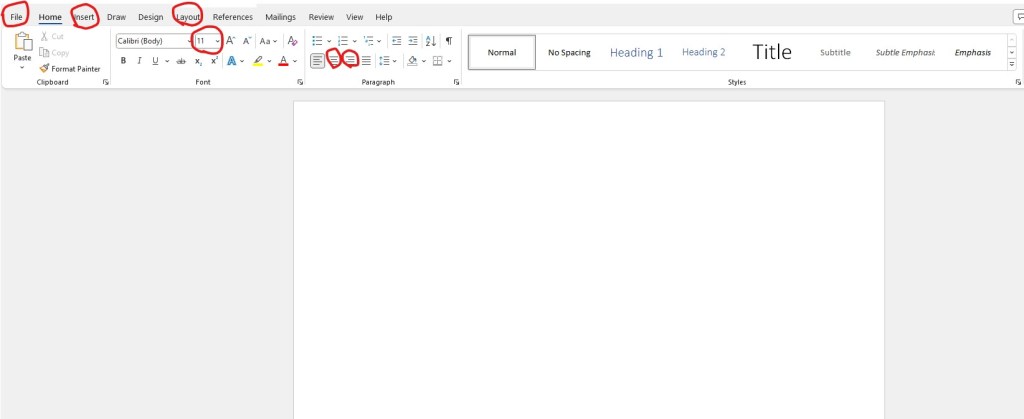
2. Next, change the layout of your document to landscape. To do this click Layout, then Orientation, then Landscape.
3. On this document, type whatever wording you would like. I went with:
“Death Certificate
Digital image download from GRO website
Downloaded by [your name] on [leave this blank, date to be added to each new document when you use the template]”
4. Then adjust the size of the font by changing where it says ’11’ on the example above. I went with font size 36 for the title, 22 for the ‘digital image’ description, and 14 for the bottom line. You might find it easier to use the regular ‘title’ options on Word but I wanted to control the spacings between the rows so this way suited me better.
I then moved the bottom line down the page, using the return key a few times, before centering the top two lines and positioning the bottom line over to the right (see the two lower circled options indicated on the image above.
My document now looks like this.

For the rest of the template we need information from the GRO website.
As explained in my last post, the downloads are available for three months after ordering/delivery. At the time of delivery you should get almost instant access to the images. However, I ordered mine a few weeks back, so I accessed all of the following information by going into ‘My Orders’ from the menu on the right.
5. From that page – which is what’s shown below – you can download your ‘E/W Death Digital Image’. But first, since our focus here is on creating a template, click on ‘View Details’, and scroll right to the bottom of the pop-up that appears at upper left of screen.
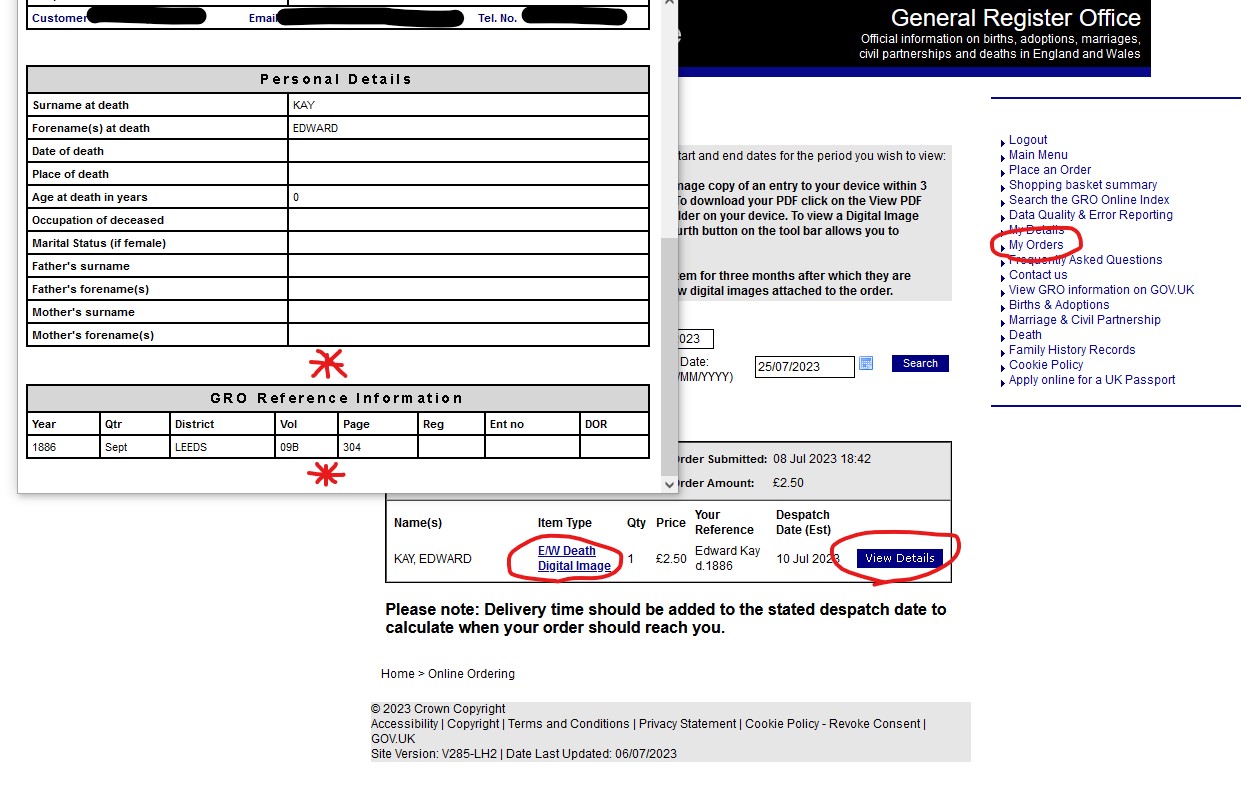
What we need is the GRO Reference Information (between the two red stars). Put your cursor at the beginning of the word ‘Year’, and highlight/copy everything along that line through to ‘Page’. Then paste this into your Word document just above your ‘Downloaded by…’ line. I centred this.
5. There is just one more thing to add to the template. We need a description of the columns, so that we can make sense of the information on the digital images from the death register as we download each one and insert it into our template. I copied that from the digital download page. Click on ‘E/W Death Digital Image’ (as circled with red on the above image), and you’ll find the digital image you’ve purchased, but above that there are the column headings. I screen-grabbed that and saved it. You can do the same thing, or you can click on the image I copied, below, to make it bigger, then right click and save to your own computer in a place you’ll find handy. The one I’ve included below has been lightened a little in Photoshop to make it easier to read the lettering. The one included in my example template at the bottom has not been lightened, so you can see the difference.
6. Either way, you now need to insert it into your Word document beneath the title and description lines. To do this, place your cursor a couple of lines below the ‘Digital image download from GRO website’ line, then click on Insert, then Picture, then ‘This Device’, and navigate to where you save the image to retrieve and insert it.

Your document should now look something like this.

7. You’ll now need to save this document, but instead of saving it as a regular Word document, click on File, then Save As, and then from the drop-down menu, save as a Word Template (.dotx).
As you get each new GRO digital download image from the Death Register, all you have to do is open the Template, download and insert the new image, and copy the date, quarter, district, volume and page details from the website (just as we copied the upper line in step 5. You’ll also need to insert the date. Remember to save each new record you create as a regular Word document.
Comparing this to the one I originally created in Photoshop, there are a few differences, but you can see how it all comes together.

If you like how this works for you, you can create another one for your Birth Register digital downloads.
I hope you found these instructions clear. Let me know how you get on.


